Projects
Create and manage the top-level containers for everything you test in Usertopia.
Managing Projects
Projects are the top-level organizational container in Usertopia. Each project represents a single web application, API, or mobile app that you want to observe, test, and heal.
Inside a project you will find all of the resources associated with that application:
- User Stories -- the test scenarios that define what to validate
- Test Runs -- execution history and results
- Session Recordings -- captured user sessions from the Chrome Extension
- Bugs -- issues discovered during test runs
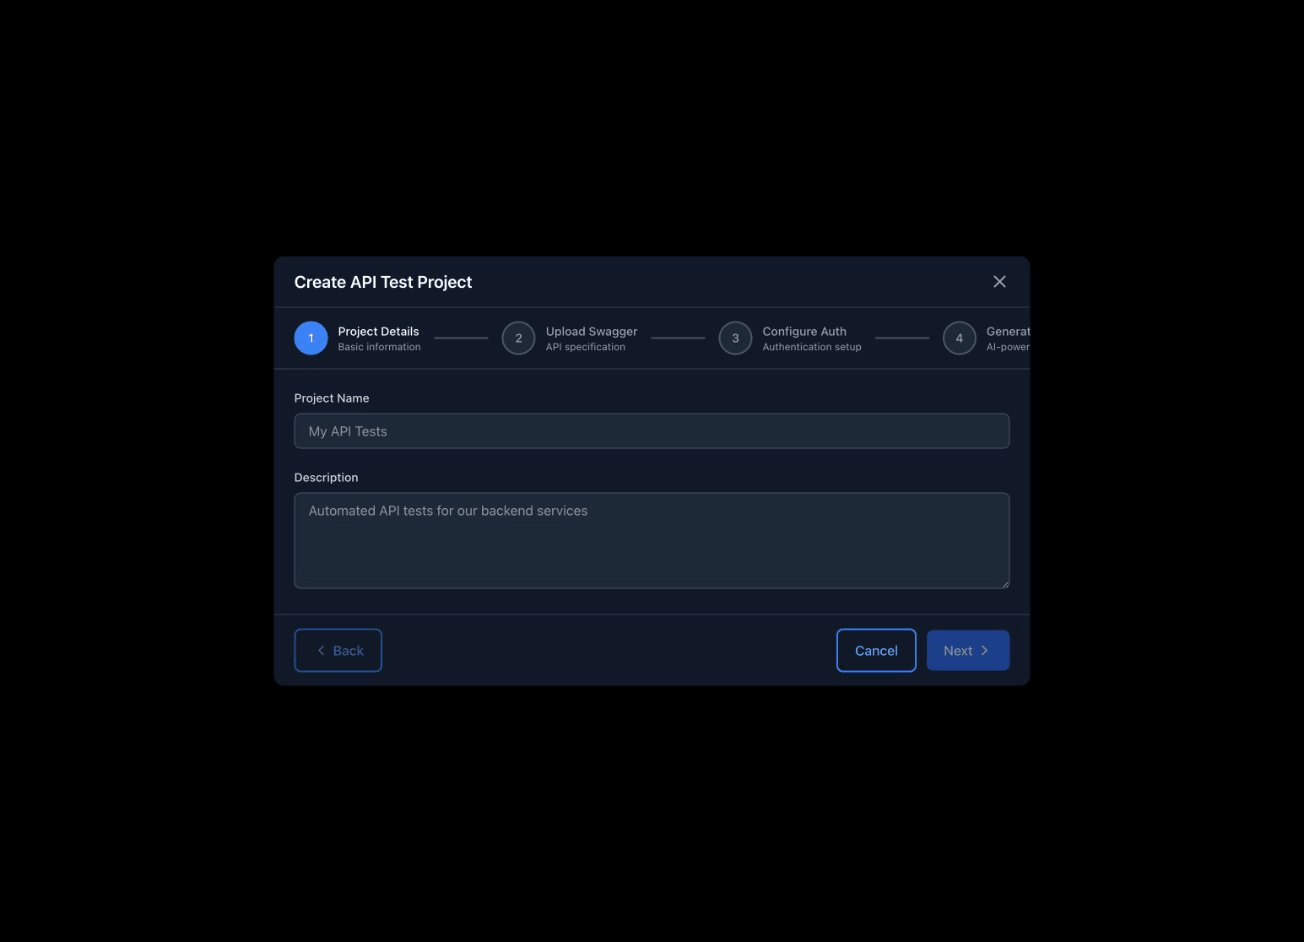
Creating a Project
To create a new project, navigate to the Dashboard and click the "New Project" button. You will be prompted to fill in a few details.
Project Fields
https://app.example.com).
Tip: If you add a Repository URL at creation time, the auto-fix agent is able to generate pull requests as soon as it detects a fixable issue.
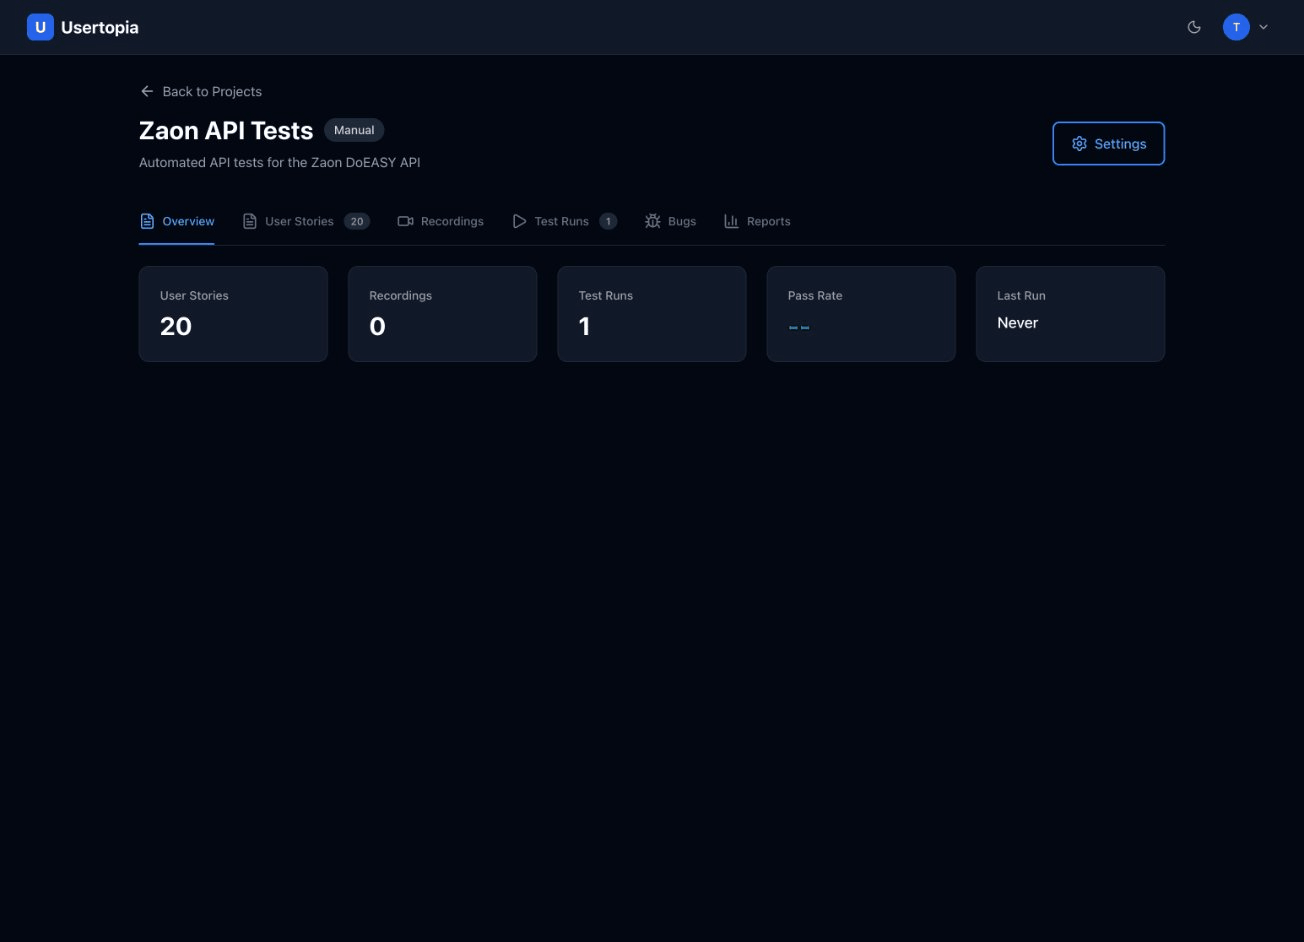
Project Detail Page
Clicking into any project from the Dashboard opens the Project Detail view. This is your command center for everything related to that application.
Overview Panel
At the top of the page you will see a summary of key project metrics at a glance:
24
User Stories
18
Test Runs
92%
Pass Rate
5
Open Bugs
Tabs & Sections
Below the overview panel you will find navigation tabs that let you drill into each area of the project:
- S User Stories -- view, create, and manage test stories
- T Test Runs -- see past and in-progress runs with pass/fail breakdowns
- R Recordings -- browse uploaded session recordings
- B Bugs -- review issues discovered during test runs
Importing a Swagger / OpenAPI Spec
If your application exposes an API, you can import its OpenAPI (Swagger) specification and let Usertopia auto-generate test stories that cover your endpoints.
How to Import
- 1 Navigate to your project and open the Settings tab, or use the Import Swagger button on the User Stories tab.
- 2 Upload your specification file (JSON or YAML), or paste its contents directly into the editor.
- 3 Usertopia parses the spec, identifies all available endpoints, and generates draft test stories you can review, edit, and activate.
Supported Formats
Project Settings
Open the Settings tab on any project to configure behaviour and integrations.
Auto-Fix
When enabled, Usertopia will automatically generate code fixes and submit pull requests for bugs it discovers.
Integrations
Connect your project management tools so Usertopia can file tickets automatically.
Notifications
Choose how you want to be notified about test results and discovered bugs.
- Email on test run completion
- Email on new bug detected
- Webhook for custom integrations